I recently went through the process of purchasing a new fishing boat. As any fisherman knows, you have everything you could ever possibly need, until your next time out that is. After a year of fishing with my Minn Kota Terrova 55# bow mount trolling motor, I was ready for an upgrade. I wanted some extra power and I wanted something with a few more bells and whistles.
I shopped the market for a while and ended up finding a great deal on a new Minn Kota Terrova 112 trolling motor. The difference is truly remarkable and this newer, more powerful option is packed with features and upgrades that make life on the water even better. To save some time and money, I took on the challenge of figuring it out for myself rather than have the boat sit in the shop for a few weeks. After all, was said and done, I decided to write a review on it.
I also added a video explaining the I pilot, spot lock system, and a video/instruction on how to wire a 36V battery system in series. Hope this review and instruction help you along in your process of purchasing and installing your new trolling motor.

Minn Kota Terrova 112 Trolling Motor
When I was shopping for the best available trolling motor options, this one really fit exactly what I was looking for in a bow mount trolling motor. The Minn Kota Terrova 112 is packed with bells and whistles, mainly due to the I pilot option.
What sold me on this motor, aside from the i-pilot capabilities, was the power this motor has. Due to the fact that my outboard idles at just a touch north of 2mph and me not wanting to buy a kicker motor, I needed something that gave me the option to troll crankbaits at a fairly fast clip.
I have an 18′ deep-V Tracker and with light wind conditions the Minn Kota Terrova cruises at a cool 3.4mph, much faster than I need. What impressed me the most, however, was the battery life of the 36V system that powers the trolling motor.
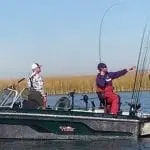
At first, I was reluctant about adding so much motor for my boat, however, after doing it and using it in all sorts of weather conditions, I am VERY glad that I did. We recently just fished 3 straight days (8+ hours per day) in 30 mph winds, and really put this to the test. We trolled into the wind, utilized spot lock in high winds, drifted and used the trolling motor to keep us in line. We also cruised miles of shorelines and cast baits along shorelines. With a quick plug in overnight, we never once got below 50% battery. This quickly erased all doubts I previously had on if making an upgrade was truly necessary.
The Minn Kota Terrova comes with some many options, I’ll be honest, I am still learning new things every trip. There are 55, 80, and 112 lb thrust options, but for the sake of this review, I am specifically talking about the 112 option.
Minn Kota Terrova Trolling Motor Features:
- Spot-Lock GPS anchoring system. This feature is my favorite. At the press of a single button, it allows you to electronically anchor your boat in any given area. If you find the fish, press the button, and you are instantly locked on top of that spot as your motor will adjust itself to compensate for drift, wind, current, etc.
- The Redesigned stow/deploy lever. The old lever system was fine, but it wasn’t great. You really had to apply a fair amount of sudden force to get the motor to deploy as well as when you were putting it into a locking position. The new Minn Kota Terrova lever makes this process so incredibly simple.
- Autopilot. This feature is also one of my favorites. This feature allows you to set a path, pick a speed, and off you go without having to worry about controlling the trolling motor. I use this when I find a good contour line and know the speed in which I am going to be dragging baits.
- The foot pedal and hand remote option. For much of my fishing, I like the remote control option best. It’s easy to use to control direction, dial the speed and has all the features at the press of a button. It hangs around my neck out of the way. I like that I can control the boat, no matter where in the boat I am fishing. The foot pedal option is nice though and definitely has its time and place. When I am cruising the shallows and actively casting, this option is easiest because I have all the control using my feet and my hands are free to cast as I please.
- Weedless prop. Have had zero issues thus far with any debris collecting on the trolling motor blades or shaft.
- Universal Sonar 2. Easily connect a sonar device to the trolling motor in the front of the boat without the need to mount an additional transducer. With one connector plug, you can easily attach an additional graph. Note: Side imaging and down imaging functions are not available.
PROS:
- I Pilot is a game changer.
- Easy installation (see below)
- Plenty of power and battery life
- Remote and foot pedal option
- Easily connects to most sonar. Link option available to connect and control directly from the graph.
CONS:
- Expensive, but you get what you pay for.
- No side or down imaging capabilities unless you install a transducer.
- “Link” option is very expensive.
amzn_assoc_tracking_id = “flywa-20”;
amzn_assoc_ad_mode = “manual”;
amzn_assoc_ad_type = “smart”;
amzn_assoc_marketplace = “amazon”;
amzn_assoc_region = “US”;
amzn_assoc_design = “enhanced_links”;
amzn_assoc_asins = “B01M4N2UVP”;
amzn_assoc_placement = “adunit”;
amzn_assoc_linkid = “4585625cea38e13d4625347e75ff30ed”;
amzn_assoc_placement = “adunit0”;
amzn_assoc_search_bar = “true”;
amzn_assoc_tracking_id = “flywa-20”;
amzn_assoc_ad_mode = “manual”;
amzn_assoc_ad_type = “smart”;
amzn_assoc_marketplace = “amazon”;
amzn_assoc_region = “US”;
amzn_assoc_title = “Related Products”;
amzn_assoc_linkid = “cdb9dde295906a2a0f460a006b25556e”;
amzn_assoc_asins = “B000E8FSTG,B01N9ET0RY,B000MN7ES6,B00G9VL0K8”;
Installation of Minn Kota Terrova
Let’s get started on installing the trolling motor on your boat.
Keep in mind when reading this review that every boat is going to be different. My specific boat, and the boat referenced in this article is the Tracker Pro-Guide 18. I will take you through the installation process for the Minn Kota Terrova 112, step by step. I hope that it will assist you in some way with your installation process.
Gather your needed supplies. For me, I used the following:
- Phillips screwdriver
- Cordless drill with 9/32 drill bit
- 7/16 wrench and 7/16 socket wrench
- All nuts and bolts needed were included with the new Minn Kota Terrova Trolling Motor
Step 1: Remove the current trolling motor on your boat. For me, this was as easy as removing a handful of screws and taking the trolling motor and bracket off of the front of the boat, leaving nothing but the bare deck and holes exposed.
Step 2: Place new Minn Kota Terrova on your front deck. Remove the side panels, as pictured, to expose the holes where your bolts will go to secure your motor to the front deck. Check to see if the holes from your old trolling motor can be reused.
I was changing from the 55lb thrust to the 112lb thrust model so most of my holes could be reused. This actually kept me from installing the quick release mount, which I purchased and ended up not using. Something about drilling extra holes in my boat that didn’t sit well. (See Photos)
Step 3: Before you fasten any bolts or drill any new holes, I STRONGLY recommend this next step. With the help of a second person, if possible, deploy the Minn Kota Terrova and make sure that the shaft clears the edge of your boat. (I used some old holes and got ahead of myself, fastening it in place before I checked to make sure it would clear the front edge of my boat. Needless to say, I had to remove it again and reposition it).
Step 4: Once the trolling motor is in place and you have checked to make sure that it clears when deployed. Insert your bolts into the holes you will be using from there.
If you need to make new holes, have one person hold your motor in place, mark where your holes are to be drilled and check placement again. Drill holes as needed. Again before fastening or drilling holes, MAKE SURE your motor shaft will clear the edge of your boat when deployed.
Step 5: Once you have your Minn Kota Terrova in place, you will need fasten your bolts in place. For me, this meant removing some of the front decking so I was able to reach the bolts and tightly secure them in place using washers and nuts.(See Photos)
Step 6: Now that your trolling motor is mounted firmly in place, you can fasten the side plates on your Minn Kota. Before proceeding on to step 7, look at your wiring to determine if you need to feed your power cable down underneath your front decking to a power source.
In this scenario, I installed a new plug into my power source and left my previous wiring from my 55lb Minn Kota Terrova in place. Note that for the 36V system, 8 gauge wiring is HIGHLY RECOMMENDED. (See Photo)
Step 7: Reassemble your decking if you removed it in step 5. At this point, your Minn Kota Terrova should be firmly bolted in place, side plates reattached, front decking back together and your power cable should be in its proper place. This completes the mounting of your new Minn Kota trolling motor. Now you will need to wire your batteries in series, as demonstrated in our video below.
Thanks for reading our step by step guide on mounting your new Minn Kota Terrova trolling motor. I hope this helped you with the installation process and I hope you are enjoying using it! It truly has changed the way I fish. For a look at how to wire your batteries in series to create your 36V bank, watch our video below.
Wiring in Series to Create 36V System
Please watch our video below to help guide you through wiring your batteries in series. We will be demonstrating how to wire batteries in series to create a 36V system, as required by the Minn Kota Terrova reviewed above. The basic steps for wiring in series are listed below as well. Hope this helps your installation process!
Note: No power source should be connected to batteries when wiring in series. Batteries should be properly secured so they do not fall over or inadvertently touch cables/terminals. AVOID completing a circuit unintentionally with your tools when installing and tightening nuts. Use a multimeter to test voltage of battery bank after wiring batteries in series.
Step 1: Align the proper amount of batteries as they will sit in your boat. Each battery is 12V, so if you need a 24V system you will need two and for a 36V system you will need to three batteries wired in series.
Step 2: Connect Battery #1’s NEGATIVE to Battery #2’s POSITIVE using a bridge cable of some sort. I picked up a few from a local Auto Zone.
Step 3: Connect Battery #2’s NEGATIVE to Battery #3’s Positive. Always remember, positive goes to negative, and negative goes to positive when wiring batteries in series. Be very careful not to complete any circuits unintentionally to avoid shocking yourself. WATCH your tools when tightening nuts down to avoid accidental SHOCK.
Step 4: Apply onboard charger cables to each battery if desired (highly recommended). Each power cable connects to its own battery! (follow instructions included with whatever charger you will be using).
Step 5: At this point your three batteries should all be wired in series, meaning all three batteries are connected to each other forming a 36V block. You should have one open POSITIVE terminal on Battery #1 and an open NEGATIVE terminal on Battery # 3. You will connect your trolling motor power source to these two terminals.
Keep in mind, when selecting an onboard charger, you will need a 2 bank charger for a 24V system and a 3 bank charger for a 36V system.
amzn_assoc_placement = “adunit0”;
amzn_assoc_search_bar = “true”;
amzn_assoc_tracking_id = “flywa-20”;
amzn_assoc_ad_mode = “manual”;
amzn_assoc_ad_type = “smart”;
amzn_assoc_marketplace = “amazon”;
amzn_assoc_region = “US”;
amzn_assoc_title = “Related Products”;
amzn_assoc_linkid = “cdb9dde295906a2a0f460a006b25556e”;
amzn_assoc_asins = “B072QTMVRT,B01KZ5ZWJS,B00L5H4YCC,B071JL6LLL”;
Thanks for checking out our article! We would love to hear any feedback you might have so feel free to send us an email! If you would like to see us do any specific review or add anything to any of our reviews, please contact us! Be sure to check out our Instagram and Facebook pages as well as subscribe to our YouTube Channel for the latest from RYG!